Last updated on April 8th, 2024
This site is reader-supported. When you buy via links on our site, we may earn an affiliate commission at no extra cost to you.
If you are still looking for a dvd ripper other than WinX dvd ripper platinum, than this ripper from DVDFab can be a great alternative. But why this ripper is more expensive than other similar tools?
Well, there are reasons behind this and why some people prefer this DVDFab DVD ripper. I highly recommend you download the free trial version as you can rip 3 DVD discs for free.
But in this article, I will more focus on how to use DVDFab dvd ripper, the step-by-step guide with graphical illustrations from download, install, activate the software as well as using the ripping software with the best settings.
Part 1: Download and Install the DVDFab DVD Ripper
To Download the Software
1. Go to https://www.dvdfab.cn/dvd-ripper.htm. You can click on the “Free Download” button to freely download and trial the file or the “Buy Now” button to buy the software. Here, I click on the “Free Download” button to download the installer. If you wish to buy, follow the section below.
2. Double-click on the downloaded installer file [dvdfab_ripper_12083.exe]. This will prompt the “User Account Control” window, click on the “Yes” button to proceed.
3. Then, it will start downloading the whole installation file from the Internet. This will take some time depending on your Internet connection speed.
To Install the Software
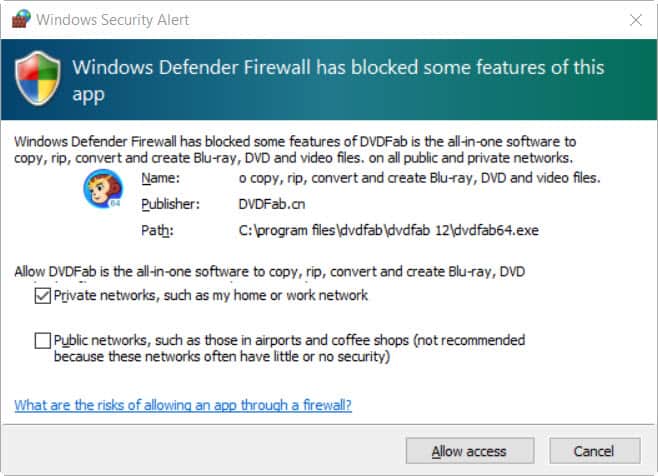
4. After finishing downloading, you may prompt the “Windows Security Alert” screen. If you are an individual using the program, I suggest you choose the option ‘Private networks, such as my home or work network’. Then, click on the “Allow access” button.
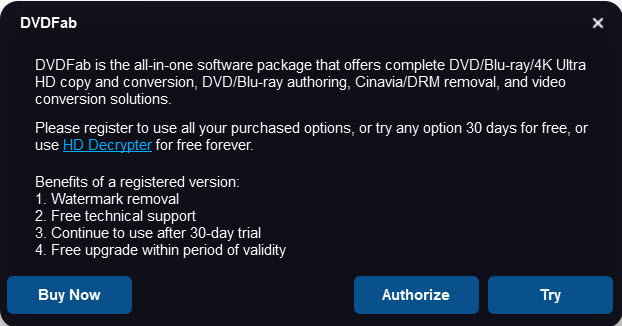
5. This will pop up on another screen as follow. You can buy the license to enjoy the full features of the software or just try the software for free. If you already bought the license key, click on the ‘Authorize’ button. Else, click on the ‘Try’ button.
6. Again, another window will pop up, click on the ‘Try’ button again to continue.
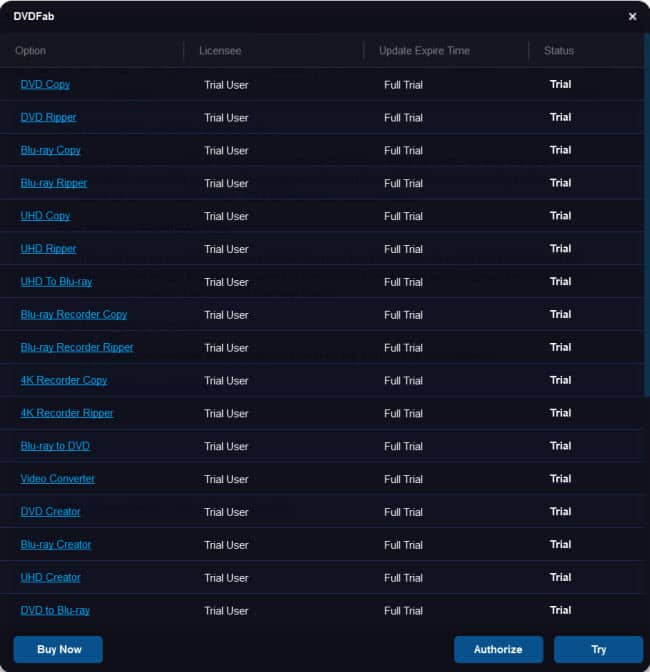
7. That’s all. The installation process is simple and now the program is ready to use. Else, you can exit the software.
Note: The installer will install all the 20+ product series of DVDFab on your computer.
Part 2: How to Buy and Activate the DVDFab DVD Ripper?
Just like any other software, you need to download and install the software before using it to convert a DVD to a digital format. Here are the steps:
To Buy the DVDFab DVD Ripper
1. First, you need to buy the license by going to the DVDFab official site: https://www.dvdfab.cn/dvd-ripper.htm
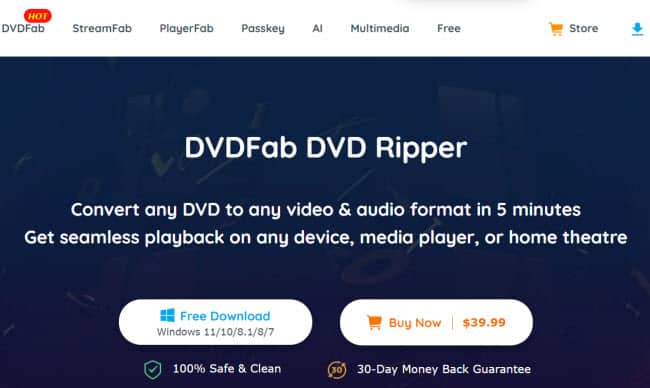
2. Click on the “Buy Now | $39.99” button. This will bring you to another screen as follow:
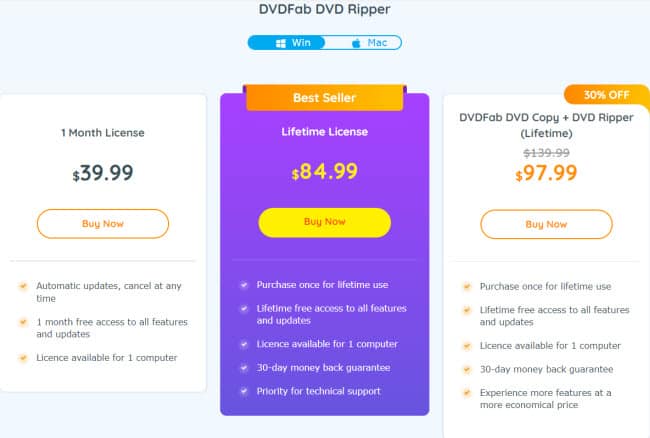
3. Choose a plan that you want to buy (1-month license or lifetime license), and click on the “Buy Now” button on the selected plan. For example, I selected a lifetime plan.
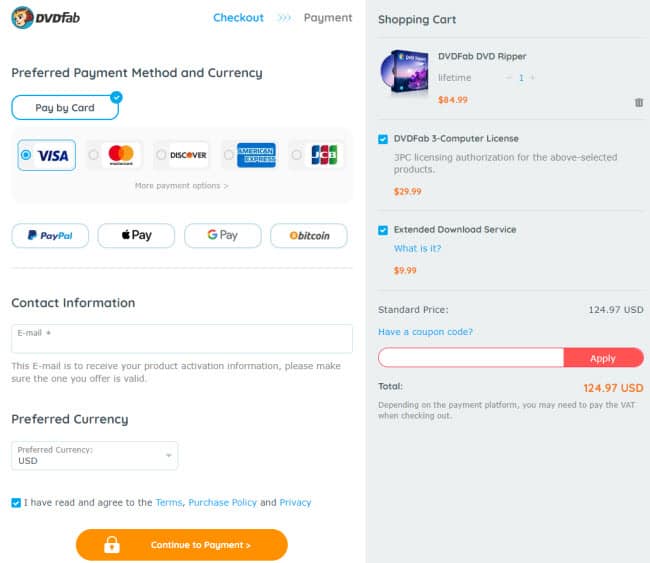
From the screen, several things to take notes of:
- You can pay by credit card (choose an option: visa, master, etc.), PayPal, Bitcoin, Apple Pay, or G Pay. Here, I will choose a Visa card.
- Fill in the contact information and email address correctly.
- Uncheck both “DVDFab 3-Computer License” and “Extended Download Service” if you do not need it
- If you have a discount coupon, click on the “Have a coupon code” link and insert the code, then click on the “Apply” option.
When everything is set, click on the “Continue to Payment >” button.
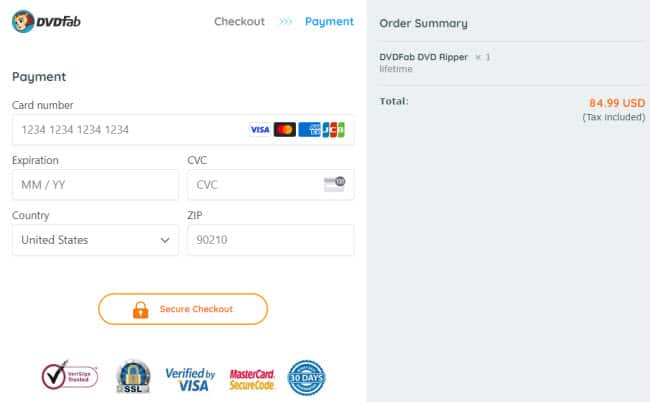
4. Fill in the card details and click on the “Secure Checkout” button to make payment. Then, you shall receive an email that contains the product registration code. This code is needed to activate the software.
To Activate (or Authorize) the DVDFab Software
Before activating the software, you need to be a member of the DVDFab Member Center and ALSO already purchase the DVDFab DVD ripper or any other of their products. Otherwise, here are the steps to register an account.
1. Go to this page: https://www.dvdfab.cn/member.htm
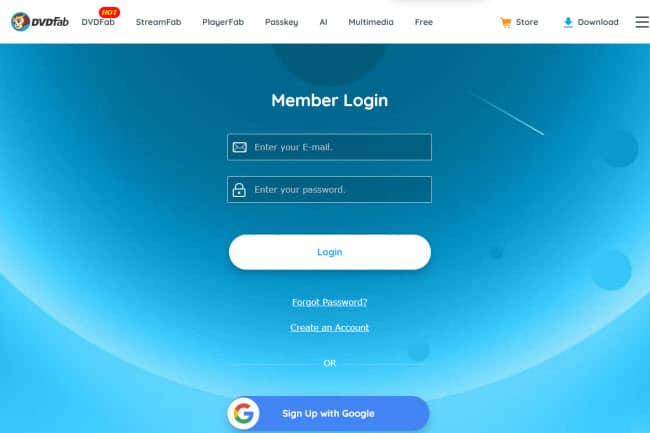
3. Click on the “Create an Account” link. Let’s say we choose to create an account option. If you have a Google account, you can choose the “Sign Up with Google” button (provided you also use this Google email address to purchase the DVDFab DVD ripper)
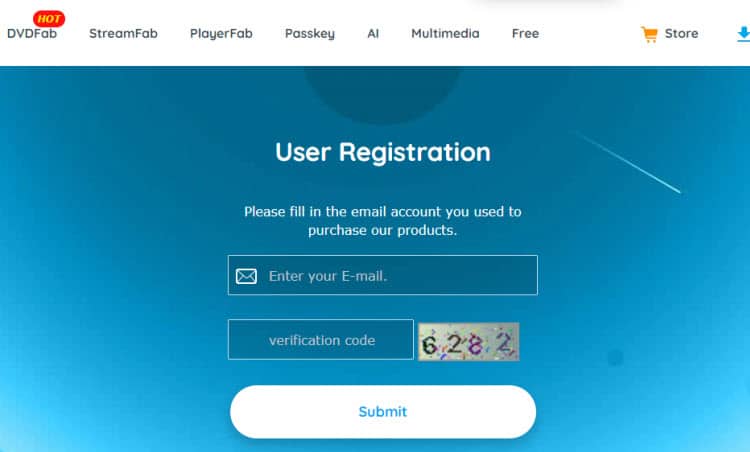
3. Insert the email address (you use when you purchase the DVDFab product) and verification code. Then, click on the “Submit” button. Once successfully registered, you can proceed to authorize the product.
4. Launch the software by double-clicking on the “DVDFab 12 (x64)” on your computer desktop, and then click on the “Authorize” button from the pop-up window.
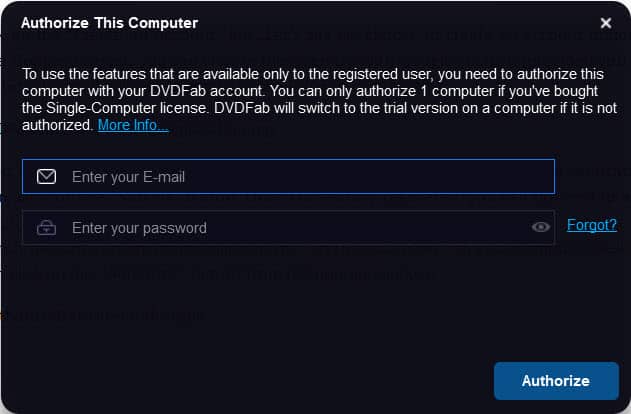
5. This will bring you to the “Authorize This Computer” window. Enter the registered email address and password that you used to register at DVDFab Member Center.
6. Click on the “Authorize” button. Then, you will see the “This computer has been authorized successfully!” message. Click on the “OK” button.
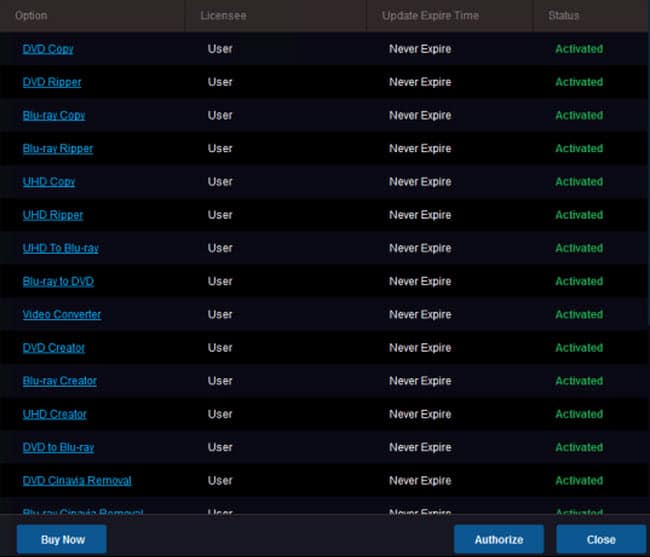
7. You should be able to see all the license information of the product(s) you have purchased. Please note that if you only purchase a specific product, i.e. DVD Ripper lifetime license, only DVD Ripper will show it’s activated and no other products.
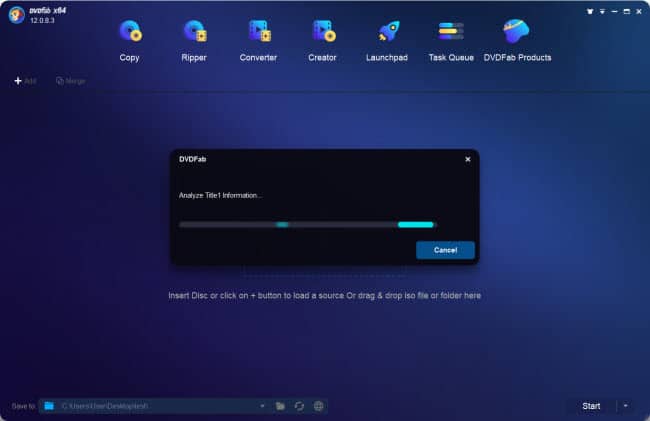
8. Please insert the DVD disc (to rip) to your computer DVD/optical drive. Click on the “Start DVDFab” button to start using the product(s). The software will automatically load the DVD as follow:
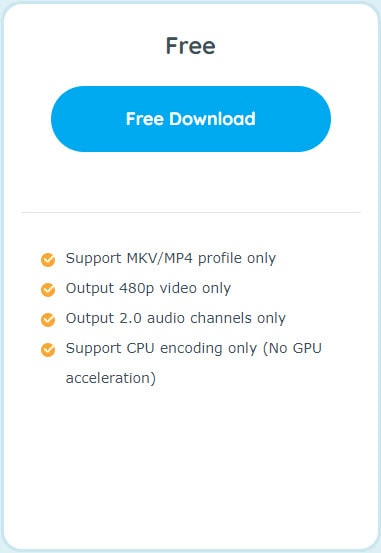
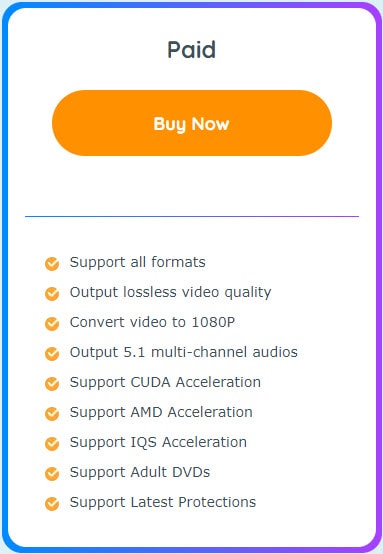
DVDFab DVD Ripper: Comparison of Free & Paid Version
Before we proceed on how to use the program, it’s good to know the differences between the free trial and paid version of DVDFab DVD Ripper.
As you can see from the comparison table above, the audio and video on output files are limited especially when the quality drops. This will affect your entertainment mode as the video may not be very clear.
Also, the free version only allows you to rip 3 DVD discs, and limited output files to MKV and MP4 format only. The ripping speeds are also slower compared to the paid version.
Part 3: How to Use the DVDFab DVD Ripper Software?
DVDFab DVD Ripper is one of the best DVD rippers on the market. If you are unsure, I also write a full review about the software here. You can follow the steps below to use the software:
Step 1: Load the DVD Source
After finishing loading the DVD disc content, you will see something like the following screen. In case it’s not loading, you need to click on the + sign and select your DVD drive folder and file to rip.
Step 2: Set the Output Format
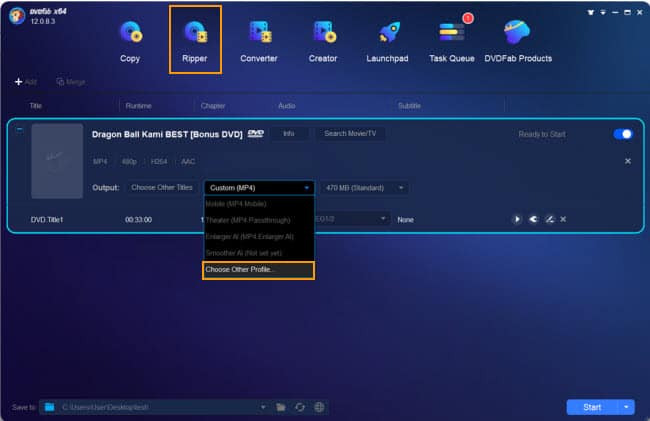
Click on the ‘Ripper’ option on the top. Then, you can make some changes to the “Output:” option like choosing the:
- Title – choose the intended title to rip
- Output profile – Click on the “Choose Other Profile” option will pop up another window for you to choose different output formats like AVI, MKV, MOV, MP4, FLV, etc. You also can make changes on some other settings but we just stick to MP4 as the output format.
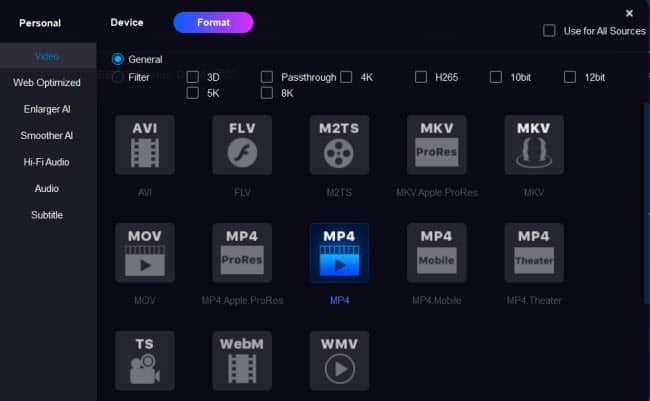
- File size – Just stick with the 470MB (Standard). You can change the other bigger or smaller files but it will affect the output quality.
Step 3: Advanced Setting and Editing
If you want to fine-tune or even edit the video before converting, you can do it with the DVDFab DVD ripper.
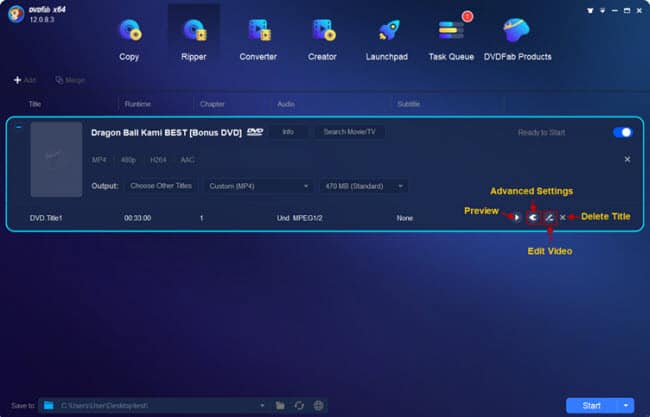
Click on the “Advanced Settings” button will bring up another window:
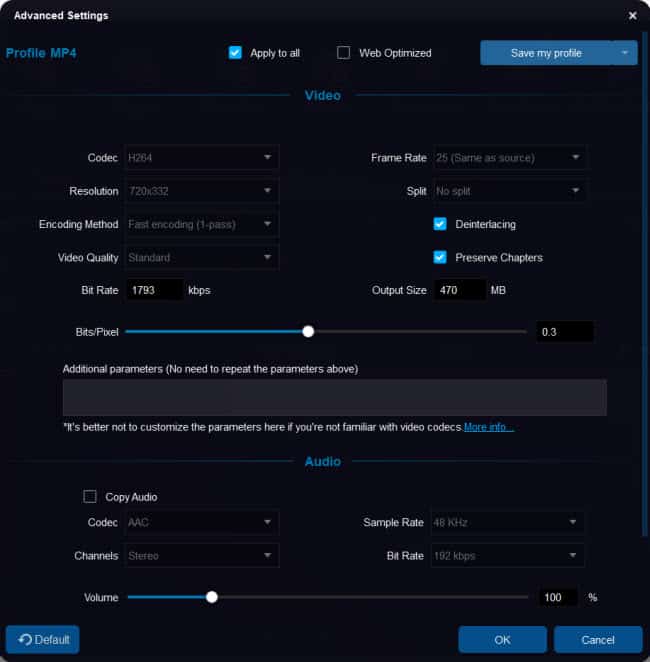
Unless you know how to change the settings, you can just leave it as default will be good to go. Changing the following video settings will make the output file change too:
- Codec: No changes are needed, just leave it as H264.
- Resolution: The higher resolution will produce better quality video, file size bigger too. Accept the default setting of 720×332 as the normal DVD video is 720x480p.
- Encoding Method: The process of compressing raw video or re-encoding a video to a different format. Use the default ‘Fast encoding(1-pass)’.
- Video Quality: You can set it to Fast Speed or High Quality.
- Bit Rate: It’s the amount of data (number of bits) transferred in one second. The higher the bitrate, the better the video quality and the file size also bigger. The recommended bit rate for video sites is 2000 kbps.
- Frame Rate: It refers to the number of images flashed on a screen in a second. It measures by FPS (frames per second) and it affects the video size significantly.
- 23.97 or 24fps – Set to this option gives us a cinematic look and is most natural to our eyes.
- 29.97 or 30fps – Used in live TV or sports. Action movies or fast-moving sports can be set to higher than 30fps.
- Split – Apply this only if you like to split the video chapters.
- Deinterlacing – This can make the video output better quality, especially for interlacing videos. You can check this option.
For audio settings, I do not encourage you to change any setting except the volume. By default it’s 100% like the original DVD, you can increase or decrease it as needed.
Note: For video editing, just click on the “Video Edit” button but it requires a DVDFab extension (download and run it) in order to use this feature.
Step 4: Set the Output Destination
At the bottom of the screen, you can see the “Save to:” where you can change the destination folder to save the ripped files. Click on the ‘folder’ icon to set a new destination or click on the ‘web’ icon (required DVDFab extension) to upload the file to Youtube, Facebook, or Vimeo.
Step 5: Start the DVD Ripping
Just click on the ‘Start’ button to begin the DVD ripping process. Please note that if the DVD comes with any kind of protection, the software can automatically remove and rip the encrypted DVDs.
Also read:
Conclusion
No doubt that DVDFab dvd ripper is a great piece of software. In fact, this program gets frequent updates to ensure it can rip the latest DVDs. The attractive program interface and easy-to-use make it one of the ideal dvd rippers in the market.
I strongly believe this comprehensive guide can help you know how to effectively activate and use the software. In case you still encounter any problems, you still can contact the program manufacturers by emailing service@dvdfab.cn.

