Last updated on April 6th, 2024
This site is reader-supported. When you buy via links on our site, we may earn an affiliate commission at no extra cost to you.
WinX DVD Ripper Platinum is one of the best dvd rippers in the market that can support all kinds of discs, including old or damaged discs, encrypted DVDs like CSS, region code, UOPs, ARccOS, and more.
In fact, this software is powerful and easy to use and hence it’s recommended by world reputable tech sites including Techradar, CNet, PC World, etc. If you are new, you can download the free trial copy to test it. We guide you on how to download, install, activate, and use the software.
For those of you that are looking for the best settings to use the WinX DVD Ripper Platinum in order to produce the best quality output while the file is not too large, please read on to find out now.
Part I: Download and Install the Software
1. The first step is to download and install the software. Click the green button below to download the WinX dvd ripper installer (31.6MB) or you can purchase the license at discounted price now (detailed in the section II below).
To direct download the free trial installer, click here. Then, follow the step-by-step guide below for the installation:
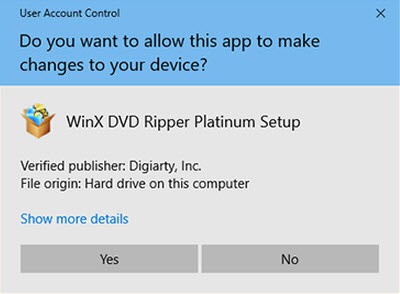
2. Locate to the folder where you downloaded the installer file. Double-click on the “winx-dvd-ripper-pt.exe” to start the installation. Click the “Yes” button if prompted by the “User Account Control” window.
3. A new pop-up window that required you to choose the setup language. In this case, you can choose the preferred language but here I will stick with ‘English’ and click the OK button to proceed.
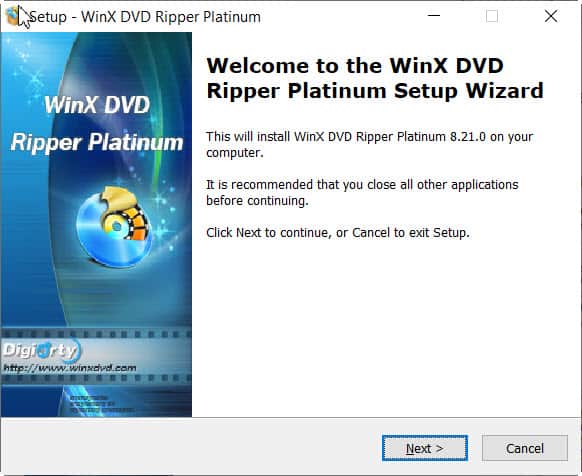
4. You will see the welcome screen. Just click the Next button to continue.
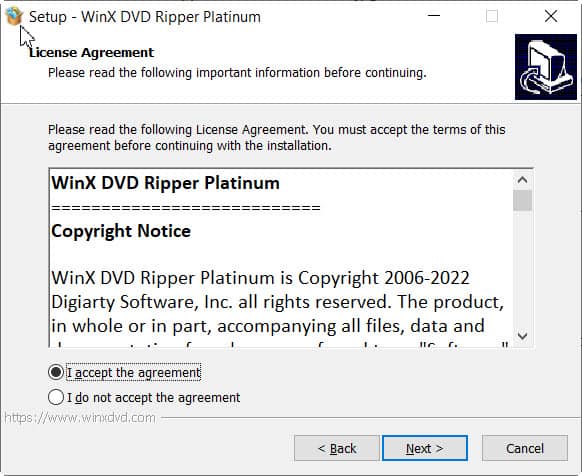
5. The next screen is about the license agreement. Go through the copyright notice and choose the option “I accept the agreement”. Then, click the Next button to continue.
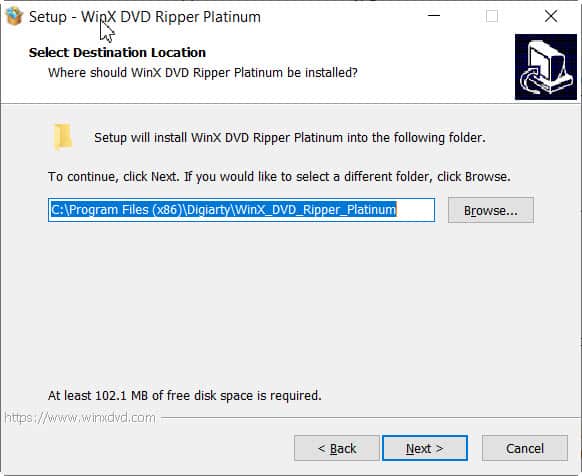
6. This screen allows you to choose the location to install the software. To change, click the Browse button and choose a new location. Else, just leave it and no changes are required. Click the Next button to proceed.
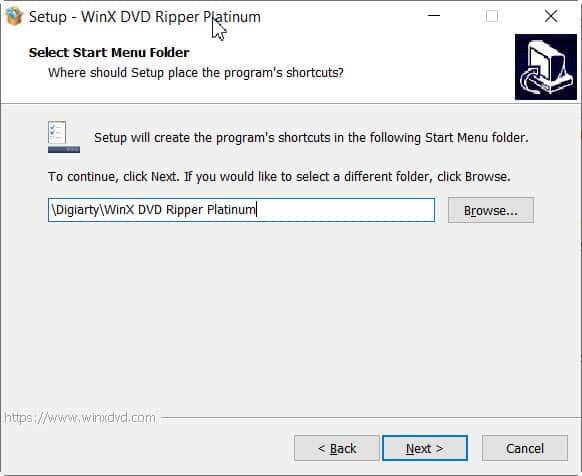
7. On this screen, you can choose the start menu folder. Usually, no changes are needed and you just click the Next button to continue.
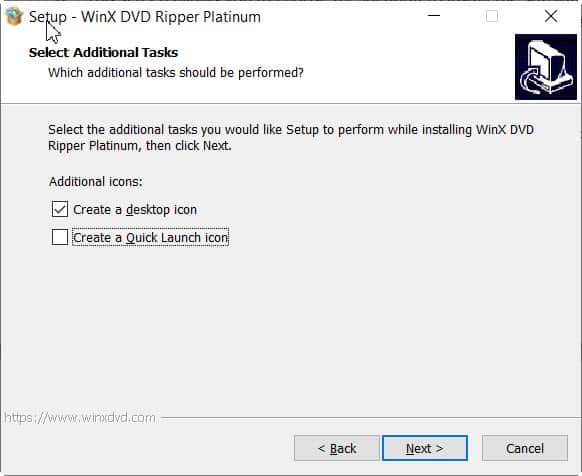
8. The next screen allows you to create the desktop and quick launch icons. For me, I don’t want to create a quick launch icon and hence I uncheck it. Click the Next button again to continue.
9. Here, you will see the options that you have chosen in the previous steps. Just click the Install button to start the installation process.
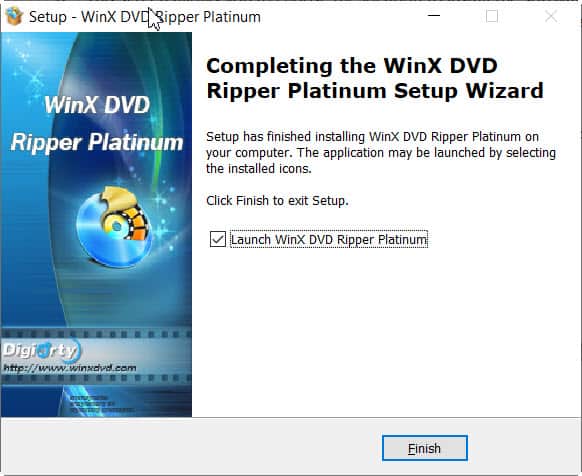
10. Click the Finish button and this will launch the WinX DVD Ripper Platinum software. You can close the program if not using it now.
Please note that this is a trial version and it has some limitations, e.g. limited to convert 5-min of videos on DVD, no advanced features available, and no free software upgrade. Hence, if you want to remove the trial limits, you need to purchase the full version.
Part II: Buy WinX DVD Ripper Platinum License Code
There are many reasons why you can purchase this software. In fact, our editors rated this as the best dvd rippers in the market now. You also can read the full review of this software here.
Here are the steps to buy the software:
1. Go to the official page: https://www.winxdvd.com/dvd-ripper-platinum/
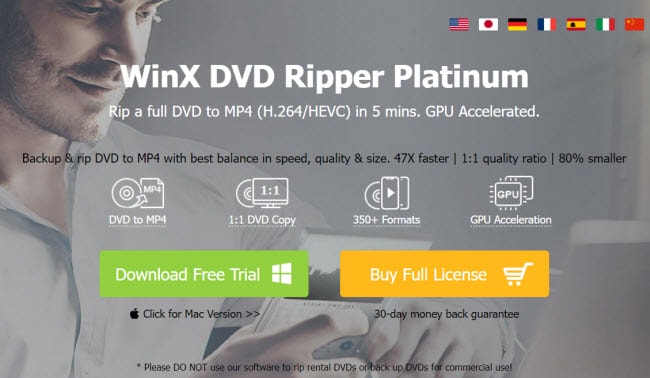
2. Click on the Buy Full License button. This will bring you to another page and you can choose from the 2 license options available:
- Premium License: One-year subscription (3 PCs) – $34.95
- Ultimate License: Lifetime subscription (1 PC) – $59.95
Select which license you want to buy, and click on the Buy Now button below it.
Note: For a lifetime subscription, a special discount coupon is available here.
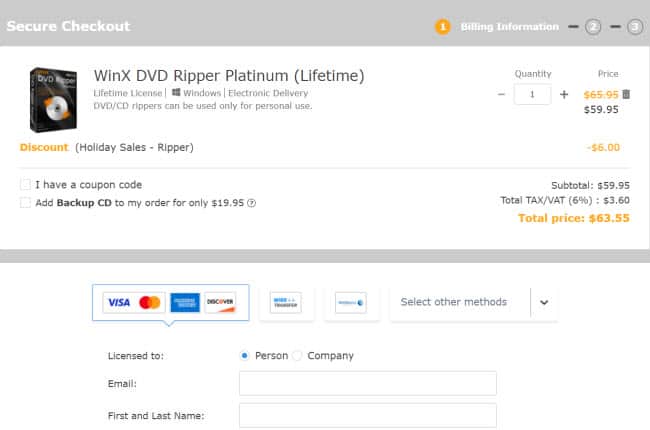
3. You need to fill up your credit card details before clicking on the Continue button to proceed with the payment. In some countries, you can use Paypal to make payments.
4. Once you make the payment, you will receive product info and license code at the email address you provided.
Part III: Register and Activate the Software
1. Launch the WinX DVD Ripper Platinum software.
2. From the screen, click on the Register button on the menu. This will pop up another window.
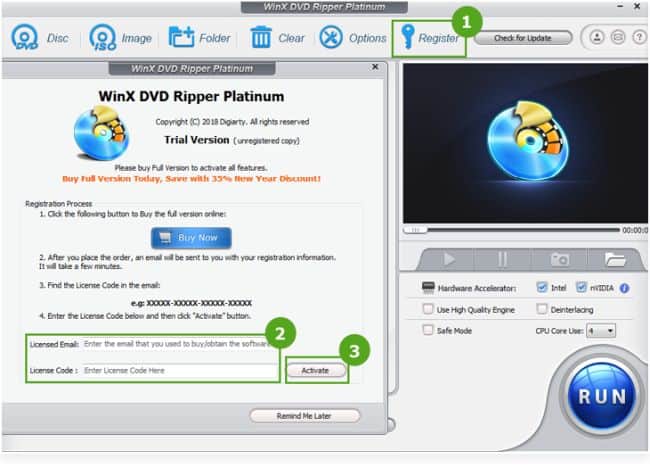
3. Insert the License Email and License Code that you received in your email upon purchasing the license.
4. Click on the Activate button to activate the software. This will unlock the free trial limits and the software can functions with full functionalities.
Part IV: How to Use WinX DVD Ripper Platinum?
The WinX dvd ripping software is not difficult to operate. In fact, you can rip a DVD with just 3 easy steps. Here are the step-by-step guides:
1. Make sure you have already downloaded, install and activate the software. Then, launch the WinX dvd ripper platinum software. Just close any extra pop-up.
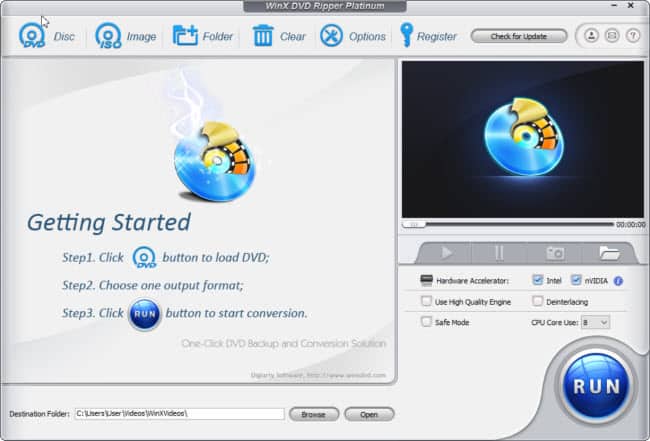
2. Insert the DVD disc to rip into your computer dvd/optical drive. You will see the menu contains 3 main options that we usually will use:
- Click on the DVD Disc option for ripping the DVD content to digital format.
- Click on the ISO Image option for ripping the DVD to ISO Image.
- Click on the Folder option for ripping the DVD to the DVD folder.
Here, we click on the DVD Disc option. A new pop-up will ask you to “select the source DVD drive”, just chose the correct drive and click on the OK button.
3. This will load the DVD and pop up an “Output Profile” window after the DVD is imported. This is where you choose the output file format.
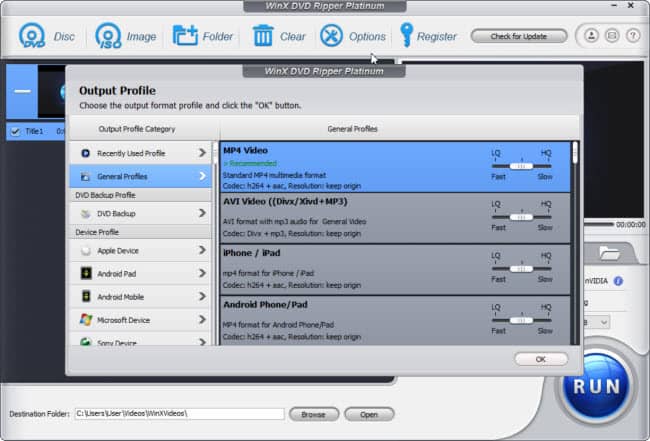
In the “Output Profile” window, you can choose the most suitable option:
- General Profiles – You can find common file formats like MP4, AVI, iPhone, iPad, etc.
- DVD Backup Profile – Best for 1:1 DVD backup/clone, else also can use DVD Copy software.
- Device Profile – Rip the DVD for playback on smartphones, smart TVs, game consoles, etc. It covers all the popular devices with available presets for easy ripping.
- Web Video Profile – Rip the DVD that can be uploaded to social media sites like Youtube, Facebook, Vimeo, or many other general video formats that you prefer.
- Common Video/Music Profile – Rip DVD to PC/Mac compatible formats, extract DVD music to audio, TS video, and more.
Here, you can select the “General Profiles” and choose “MP4 Video” as the output format. Then, click on the “OK” button. You will see the screen similar to below:
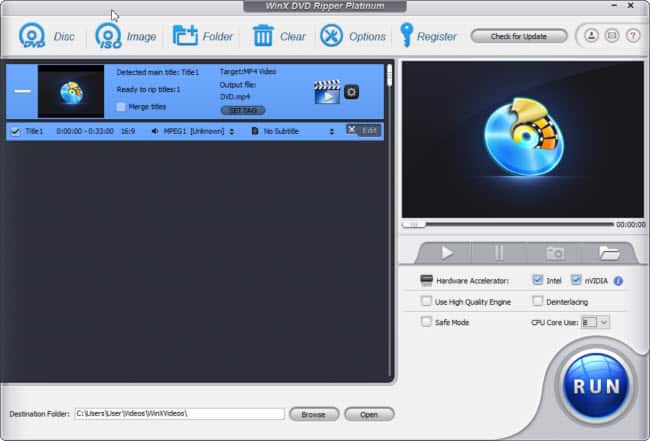
This software will auto-detect the title to rip in the correct order. It can support almost all types of DVDs including encrypted DVDs, 99-title DVDs, TV series DVDs, etc. On the right-hand side, there is an option to drag the video quality: LQ or HQ.
- HQ – better quality, file size bigger, and slower ripping speed.
- LQ – quality drop, smaller file size, and faster ripping speed.
- Intact (no change) – If you do not drag the slider, then the quality is the same as the original DVD.
The Software Best Settings for Better Output
Above the “RUN” button there are several options that you can set:
- By default, the “Hardware Accelerator” for both Intel and nVIDIA are enabled to make the dvd ripping process faster. No changes are needed.
- Choose the both “Use High Quality Engine”and “Deinterlacing” options for better image output quality. You should enable both options.
- The “Safe Mode” option is used when you encounter the ripping problems like ripping process stop unexpectedly or the conversion sequence being wrong. Only enable this option when needed.
Problem: When I try to rip a DVD using a normal way, it exits unexpectedly when reach about 97%. The ripped output file also cannot be plays.
Solution: Check the “Safe Mode” option on the main screen to solve the problem and I can successfully rip the disc and plays the output file. When check the safe mode option, the ripping speed is slightly slower as I see the FPS was change to 51.
Customize the Output Settings & Tips
Choosing the MP4 Video with codec h264 + aac, and standard 720p resolution is the best setting that have the highest quality compared to file size. However, you can do the settings as per your requirements.

1. Click on the “Gear” button to set the video output quality and file size. You will see the following screen:
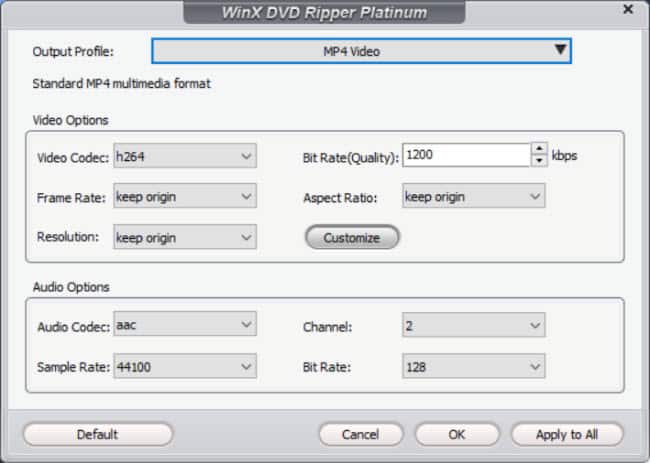
For video options:
- Video Codec: Just leave it as h264, no changes are needed.
- Bit Rate(Quality): This will affect the file size and quality. Lowering it to 1800-2000 kbps is acceptable. Recommended: set to 2000.
- Frame Rate: This will impact the viewing experience of a video. A normal setting like 23.97 is enough but if your movie comes with a lot of motions, i.e. sports, you can set it to 30 fps. Recommended: leave it as “keep origin”.
- Aspect Ratio: 3×2 is a smaller aspect ratio (usually don’t use this); 4×3 is a standard ratio; or a 16×9 (widescreen). Recommended: leave it as “keep origin”.
- Resolution: DVD videos are either 720×480 or 720×540. If you want a smaller file size, you can reduce the resolution to 640×480 or even 480×320 but the quality will drop. Recommended: leave it as “keep origin”.
For audio options, just leave the default settings, and no changes are needed. When finished, click on the “OK” button. Through our test, with the above settings, the output file size will be approximately 1 GB for an hour of movie conversion.
- Click on this “Edit” button will let you access the “Output Profile” window and you can change the intended output file format.
- Click on the “SET TAG” button to allow you to change the target name of the output file. This step is optional.
- Check the “Merge titles” option allows you to combine two titles into one and first you need to select both titles, i.e. Title 1 and Title 2.
Note: If you want to edit a particular title, just click the “Edit” button and do the changes as needed.
When all the needed settings are set, just click on the “RUN” button to start the converting DVD to digital format. The time it takes will mainly depend on the original DVD length and some of the settings that we outline in the above section. If you successfully ripped the DVD, you can see the screen show “All jobs have been completed”. Click on the “OK” button to finish the entire process.
Also read:
Conclusion
I hope this article can help you to solve your hassle on how to use the WinX DVD Ripper Platinum as I have already shown you the best settings to produce the intended output files.
After all, if you set the bit rate, frame rate, and resolution higher, then the output video will be better but ripping time will take longer too. This is an ideal option as everything wants to enjoy greater movies.
On the other hand, if you have a ton of DVD collections that need to rip, you may reduce the bitrate, frame rate, and resolutions settings to reduce the file size, and hence it also demands less space on your computer hard disk but the video quality may drop or just average standard quality.
