Graphics Interchange Format, better known as GIF file, is a bitmap image format. In simple terms, GIFs are a loop of images or soundless video that will continuously play when you open the file. A team led by Steve Wilhite created it on 15 June 1987.
GIFs use lossless data compression that reduces the file size but does not degrade the image quality. GIFs were created in the 87a format, which was upgraded to the 89a format.
Since then, almost all the GIFs have been in the 89a format. GIFs may use only 256 colors and are not ideal for a picture taken with a digital camera. These days you can record GIFs from a screen on any of your devices.
Why People Prefer GIF Format?
These days GIFs have become a part of many users doing crazy and weird things, making them into 10 to 15-second clips and sharing them. There have also been many animated GIF images and celebrity videos or movie clips all over the internet.
- One of the main reasons is that GIFs take little space, making sharing, storing, and saving them very easy. GIFs are lively and can show off more details and gestures than a simple photo.
- GIFs have become a better alternative to words and still pictures to show a reaction when messaging online or sending emotions and feelings.
- GIFs can also be used in a wide range of applications and operating systems, allowing users with support and portability without any limitations.
- Adding to the advantage is the built-in GIF search bar included by almost all social media websites. These search bars are linked with GIF sites like GIPHY and Imgur, which opens up a whole collection to pick from and makes GIFs easy to use as emojis.
Recently recording the screen and turning it into GIFs has been trending on various platforms. You can record gifs from the screen of any device and share them for educational or advertisement purposes.
The primary key to the GIFs still trending is that the GIF compression algorithm is extensible, which means that anyone can build on it to make more complex designs.
Part 1: How to Record GIF from your Computer Screen on Windows?
There are various gif screen recorders available on the internet, but we will dwell on the best and reliable gif screen recorders. You can learn the step-by-step procedure here for both Windows and Mac users.
I.) Free Gif Screen Recorder: Screentogif.com
ScreenToGif is a free software tool that can record gifs from screens that are available for Windows 10. This tool not only records but has numerous editing possibilities for GIFs.
You can download the software without any worries for third-party intervention as your privacy will be kept confidential. ScreenToGif is a user-friendly tool that is easy and provides you with a dependable interface.
The Program Features
ScreenToGif works perfectly for those who are into social media. You can start recording, then use the built-in editor to trim and make the necessary editing to have your video ready to share on social media.
The software also has a wide range of options, including deleting selected frames, removing duplicates, and changing the color of your recording. The editing also includes resizing, cropping, and adding captions, drawings, and borders, to name a few.
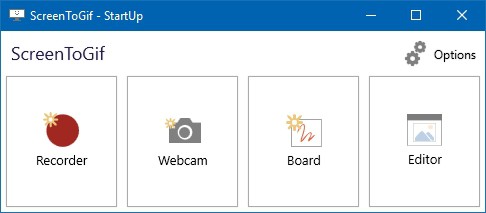
All these features in one application make it straightforward for users. ScreenToGif is a helpful gif recorder to lets you capture the screen quickly and in three different ways: Screen, webcam, and a sketch board.
Official site: https://www.screentogif.com
Step-by-step guide for screen, webcam, and sketch board recording
Please make sure you already installed the software successfully before start using it.
i.) Screen
- Launch the application. You can use the record, stop, and pause buttons as you record gifs from the screen.
- From the screen, click on the Recorder
- To select a region, input the selection mode for the entire screen or a window to record. Click the Record button to start the recording.
- Once finished, click on the Stop button.
ii.) Webcam
- You can use the record, stop, and pause buttons to record gifs from a webcam that is connected to your computer.
- Choose the maximum frequency of the capture (fps).
- To adjust the size of the recording, you have to resize the window.
- Then, click the Record button to start the recording. Click the Stop button when finished.
iii.) Sketch Board
- This sketch board allows you to capture the drawings automatically when you draw it.
- You can choose the maximum frames per second (fps) or give the exact resolutions in pixels (px).
- Then, to adjust the size of the recording, you have to resize the window.
- Press the Ctrl key for toggling or Enable auto-capture.
- When finished, use the F8 key or click the Stop button.
II.) Paid Tool: Gif Screen Recorder
The GIF Screen Recorder is one of the best tools for the Windows operating system to record gifs from your computer screen. It has a user-friendly interface with professional tools that are easy to operate and execute.
This paid tool stores the screencasts automatically as gif files which are playable on nearly any mobile device and computer. The unregistered version lets you do the screencast with a watermark on the output file.
The Program Features
One of the prominent features of GIF Screen Recorder is to combine a GIF file with an audio file, but you have to create a separate sound file.
With the aid of JavaScript, you can match the GIF animation with the audio file. Another feature is converting GIF to AVI in the editing section and publishing the animation on YouTube.
The editing can modify, add subtitles, and change images, to mention a few features. The tool works on tablets, PCs, Phones, and different social media. The gif recorder is compatible with Windows XP/7/8, and Windows 10 & 11. Also, NET Framework 4.6.1 or later is required.
Official site: http://gifrecorder.com/
Step-by-step guide to use the software
First, make sure you already installed the application. Then, plan on what you wish to record and you can start the application.
1. When you start the program, a red rectangle appears, which is the area you will record from the screen.
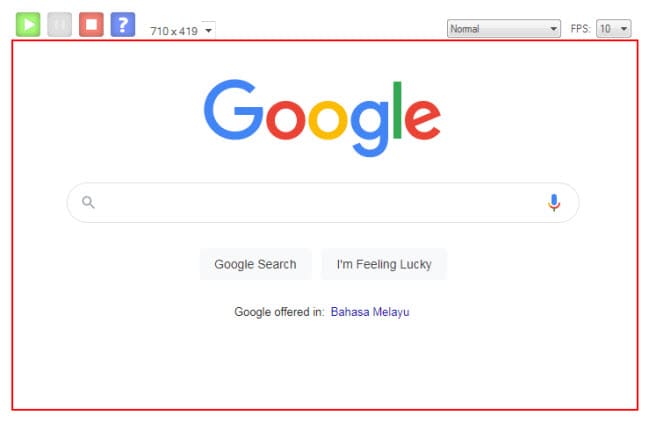
2. Select the pre-set sizes or drag a border of the recording area of what you wish to record.
3. On the top right of the recording area, you can choose the quality for a better result in the FPS: (frames per second) drop-down menu. The higher the number, the better quality but the file size is also bigger. For a fluent film, you could choose a 20 FPS.
4. For smaller file sizes, you can choose fewer colors, although the quality of the GIF might be compromised.
5. After making all your choices, you can Start Recording using the Play button (top left corner) or PrtScn
6. Once you reach the end of the screencast, you can stop the recording (use the Stop button or Esc key).
7. After saving the recording, open the file in the Animated Gif Editor, and you can start editing your recording.
Part 2: How to Capture Gif from Your Screen on Mac OS X?
For Mac users, we will introduce a free screen recorder for you to generate the gif files. It’s easy to use and user-friendly. Read on to find out more.
III.) Free Gif Screen Recorder for Mac: LICEcap
LICEcap is a free tool for Mac that allows you to record gifs from a screen. It captures the screen or an area of your screen and saves it as a GIF file.
LICEcap is easy to use, intuitive, and has a high-performance function. It can record gifs from your screen on Windows 10 and older versions. It also works in macOS 10.7-11.2 and older versions. The program requires a good amount of RAM in your device and will need a relatively fast CPU.
The Program features
LICEcap is packed with many useful features for beginners and those who want a professional output. One of the main features is that LICEcap has its own native lossless .LCF file format.
This gives users a higher compression ratio than GIF. It allows for more than 256 colors per frame, and the timestamp is reasonably accurate. With LICEcap, you can record your files directly to .GIF or.LCF.
A unique feature is that you can move the screen capture frame around as you record gifs from the screen. Also, you can insert text messages by pausing in the middle of the recording.
For more info, visit https://www.cockos.com/licecap/
Steps to Create Animated Gif with LICEcap
1. First, go to their official website to download and install LICEcap on your computer. Then, launch the program.
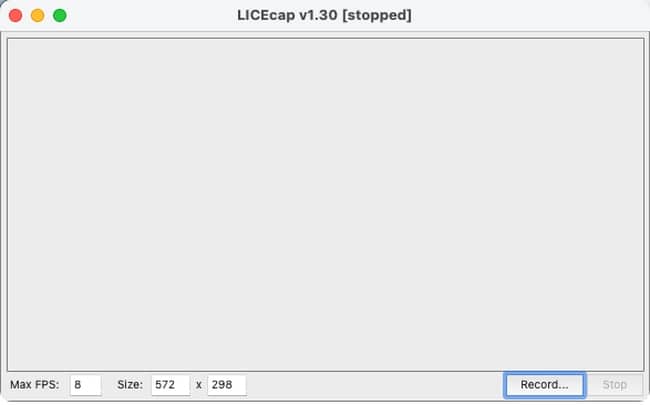
2. Click on the Record button in the lower corner of the window to start recording gifs from the screen.
3. You will prompt a window to enter a filename and set the location to save the file.
4. There will be an option to select different features according to your requirements, such as tracking and recording your mouse button.
5. When everything is configured, click the Save button and wait for the countdown to reach 0 and LICEcap will start recording.
6. You can click the Stop button once you’ve recorded the required clips.
7. You are all done; save the file and access your animated GIF screencast image for use.
Conclusion
The GIF file format has recently become the favorite and the default tool of many users for humor besides memes and viral videos.
A GIF image can be shared easily on almost every social media platform across different operating systems. It has turned many ordinary people into internet sensations.
Keeping the record gif from the screen as short and small as possible is one thing to keep in mind. Animated GIFs are a great way to spread humor with a meaningful message to educate and energize people, and it is here to stay.