Last updated on April 21st, 2024
This site is reader-supported. When you buy via links on our site, we may earn an affiliate commission at no extra cost to you.
In the digital age, where convenience and portability are paramount, people always looking for a way to transfer a DVD to an iPad so that they can watch the DVD content conveniently.
However, this task may seem daunting to those unfamiliar with the process, as it involves bridging the gap between physical and digital media.
Fear not, for in this article, we will demystify the art of transferring a DVD to an iPad, providing you with a step-by-step guide that empowers you to unlock the full potential of your tablet device.
Method 1: How to Rip and Copy DVD to iPad with WinX DVD Ripper?
Ripping or copying a DVD to your iPad using WinX DVD Ripper is a simple process that allows you to enjoy your favorite movies and TV shows on your mobile gadget. WinX DVD Ripper Platinum is one of the best DVD rippers that you can rely on.
WinX DVD ripper official site: https://www.winxdvd.com
Note: Before you begin, make sure you download and install the WinX DVD Ripper Platinum on your computer. You can download it from the official website. Then, follow the step-by-step instructions below closely:
Step 1: Launch the WinX DVD Ripper Platinum
Insert the DVD disc you want to rip into your computer’s DVD drive and launch the software.
Step 2: Select the Source
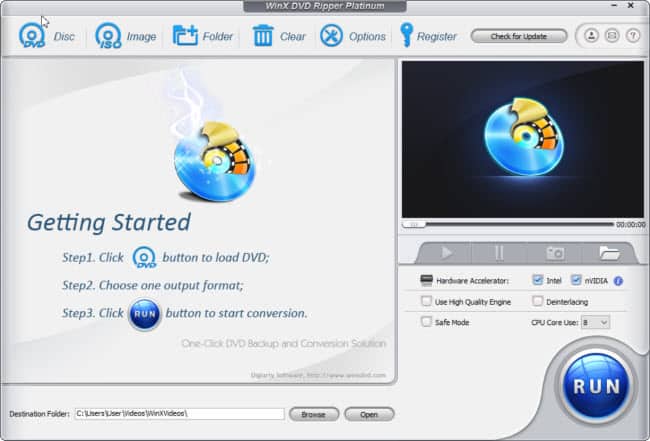
In the WinX DVD Ripper Platinum main interface, click on the “DVD Disc” button and you will be prompted to choose the DVD drive. Once you click on the “OK” button, the software will automatically analyze the content and display the titles, allowing you to choose which ones you want to rip.
Step 3: Choose an Output Profile

Next, choose an output profile compatible with your iPad. WinX DVD Ripper Platinum provides several predefined profiles for various portable devices. For iPad, you can select the following:
- Choose the “Apple Device” under the “Output Profile Category”.
- Then, choose the “to iPad Video” option.
- From the list, choose the appropriate iPad model that you have, such as “iPad Pro (MPEG4).
- Click on the “OK” button.
Step 4: Customize Settings (Optional)
If you want to customize the output settings, click on the “Settings” button. Here, you can adjust parameters such as video and audio quality, resolution, codec, and more according to your preferences. For most users, the default settings should work well.
Step 5: Choose the Destination Folder (Optional)
At the bottom of the screen, click on the “Browse” button to choose the destination folder where you want to save the ripped DVD files.
Step 6: Start Ripping
Once you have configured all the settings, click the “RUN” button to start the ripping process. WinX DVD Ripper will begin converting the DVD into a format compatible with your iPad.
Step 7: Transfer to iPad
After the ripping process is complete, connect your iPad to your computer using a USB cable. Then, open iTunes or any other file transfer software you prefer and transfer the ripped DVD files to your iPad. More detailed in the section below…
Once the transfer is complete, disconnect your iPad from your computer, and you can now enjoy your ripped DVD content on your iPad anytime and anywhere.
Now you can watch your favorite movies and TV shows on your iPad without the need for a DVD player or an Internet connection. Also, check out the best dvd to iPad ripper reviews.
Method 2: How to Convert the DVD into iPad with Free HandBrake?
If you prefer a free DVD ripper, then you can use the HandBrake to help you transfer a DVD to an iPad-compatible format without any hassle. Follow the steps below on how to do it.
Also, make sure you already downloaded and installed the HandBrake software before starting to use it.
HandBrake official site: https://handbrake.fr
Step 1: Launch HandBrake
Start launching HandBrake on your computer and you will see something like below.
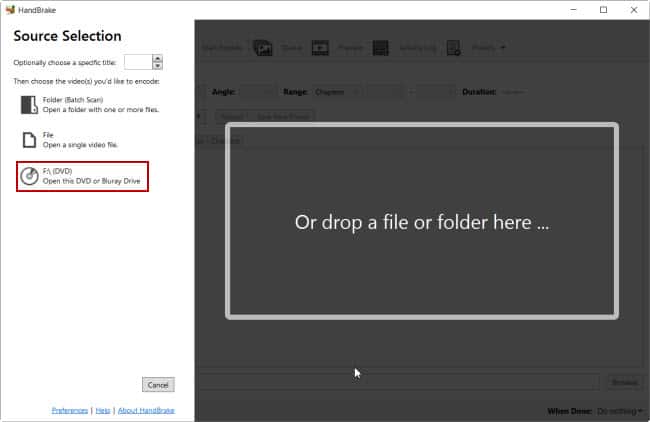
Step 2: Source Selection
In the left-hand panel, under the “Source Selection”, click on the DVD drive (i.e. F:\(DVD)) as the source. HandBrake will automatically scan the DVD and display its contents.
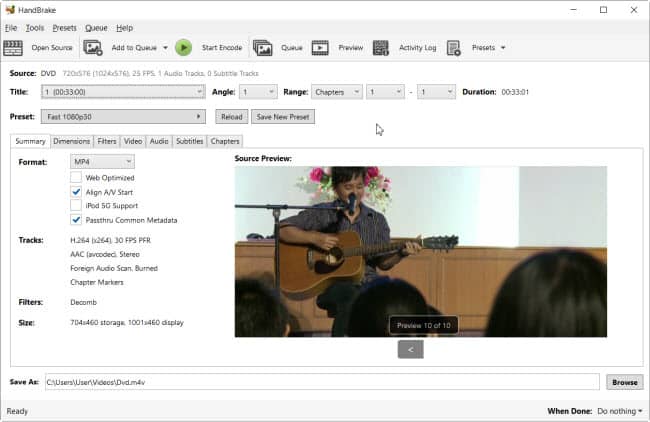
Step 3: Choose a Title
HandBrake will typically select the longest title on the DVD by default, which is usually the main movie. However, you can choose a different title if needed by clicking on the dropdown menu next to the “Title” column.
Below it, there is a “Format:” column that allows you to choose the output file format. You can choose the “MP4” as it’s widely accepted format by many devices.
Step 4: Select the iPad Preset
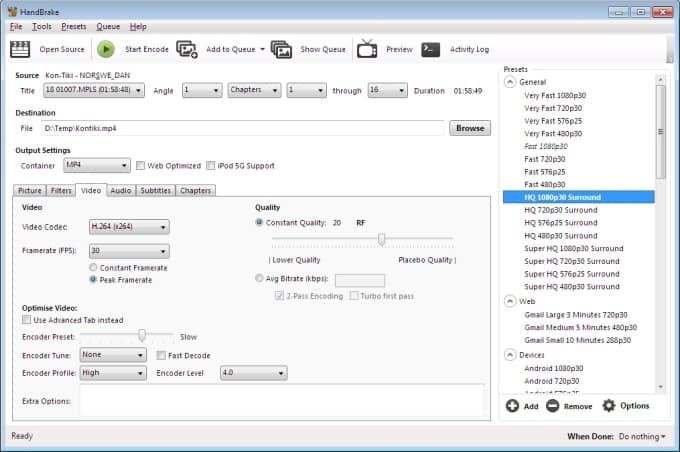
In the “Presets” on the top side of the HandBrake window, you’ll find a list of pre-configured settings for various devices, including iPads. Choose the iPad preset that matches your iPad model, such as iPad Pro, iPad Air, and iPad Mini.
From the list of presets available, click on the “Devices” category. Then, choose an option from “Apple 1080p60 Surround”, “Apple 1080p30 Surround”, or “Apple 720p30 Surround”, according to your iPad model.
Step 5: Adjust Settings (Optional)
If you want to fine-tune the output settings, you can click on the “Video”, “Audio” and “Subtitles” tabs to make adjustments. However, the iPad presets usually provide optimal settings, so you can skip this step if you’re unsure.
Step 6: Choose a Destination Folder (Optional)
Click the “Browse” button in the “Save As:” section at the bottom of the screen to select the folder where you want to save the converted iPad-compatible video file.
Step 7: Start the Conversion
Click the “Start Encode” button to begin the conversion process. HandBrake will start converting the DVD into a format compatible with your iPad.
The Steps to Transfer DVD Ripped File to iPad
After the conversion is complete, transfer the ripped file to iTunes and connect your iPad to your computer using a USB cable. Then, open iTunes or any other file transfer software you prefer and transfer the converted video file to your iPad.
Also, ensure that the latest iTunes version is installed on your computer. The Wi-Fi is turned on. Then, follow the step-by-step guide below:
1. Open the iTunes software on your computer.
2. From the “File” menu, click on “Add File to Library…”. Browse for the DVD file that was copied or ripped to your computer and add it to iTunes.

3. The added video files will appear under the “Movies” library on your iTunes app (in the left panel).
4. Then, you can connect your iPad to your computer using a USB cable. For the details on how to sync iTunes to iPad, follow the video below:
That’s it! You’ve successfully converted a DVD into a format compatible with your iPad using HandBrake. Now you can watch your favorite movies and videos on your iPad whenever you like.
Conclusion
In conclusion, the process of transferring a DVD to your iPad has been simplified through the steps outlined in this article.
You need solid software, and we recommend WinX DVD ripper platinum which can bridge the gap between physical and digital media, preserving your DVD collection and enhancing your iPad’s versatility.
Whether it’s a classic film, a beloved TV series, or a home video, the power to carry your cherished content with you on your iPad is now at your fingertips.